How to Use the Product Customizer
This guide explains what each icon means and how to customize your item using our design tool. Use the menu below to jump to the section you need.
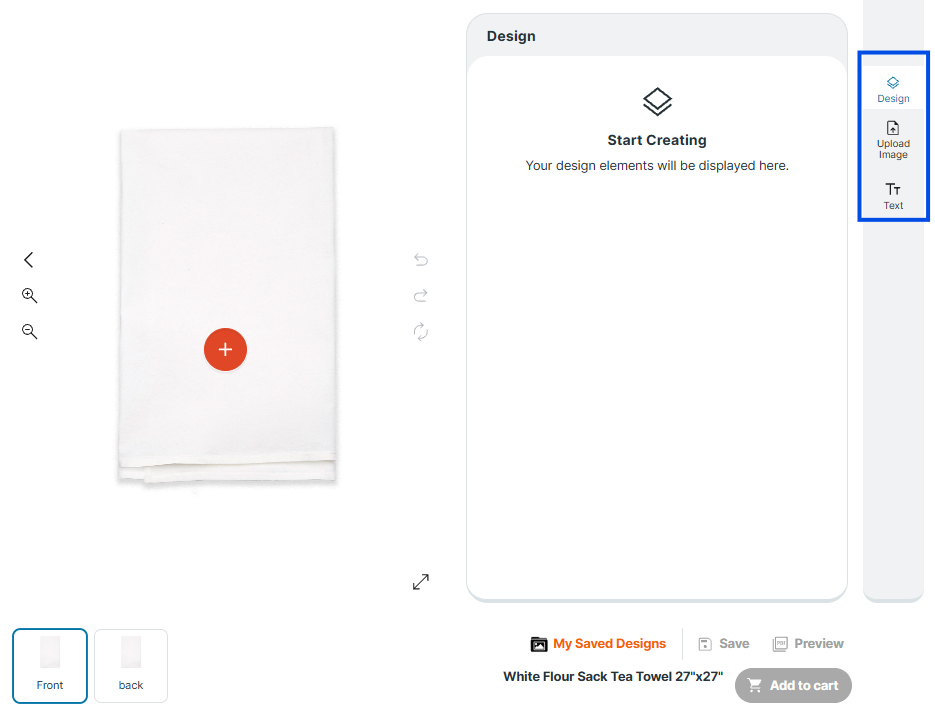
Start here
When the customizer opens, you will see the product on the left and the tool panels on the right. To begin, click one of these options on the right side: Design, Upload Image, or Text.
- Click Text to type a name or phrase, or click Upload Image to add your artwork.
- Click your design on the product to move it and resize it.
- Click Preview to double check everything and download a PDF mockup.
- Click Add to cart when you are ready.
Right toolbar
These icons are on the far right side. They control the main tools.
Design (stacked layers icon)
Opens the Design panel. This is where your added design elements appear. If you do not see your element, click Design to return to the main panel.
Upload Image
Opens My Uploads. Use this to upload a photo, logo, or artwork from your device. After uploading, click the thumbnail to place it on your product.
Text
Opens the Text panel. Type your text, then adjust font, style, color, size, spacing, and alignment.
Canvas tools
Zoom in and zoom out
Use the plus magnifying glass to zoom in and the minus magnifying glass to zoom out. This helps when you want to position small text or line things up.
Back arrow
Use the left arrow to exit the customizer.
Undo, redo, and rotate
Use Undo to reverse your last change, and Redo to bring it back. The rotate icon lets you rotate the selected item.
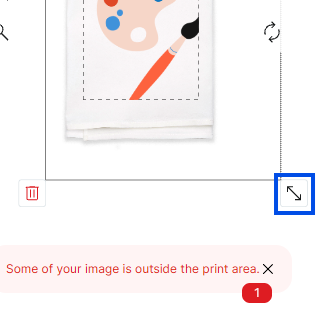
Print area guide
The dashed lines mark the maximum print area. Keep your visible design inside this area before adding it to your cart.
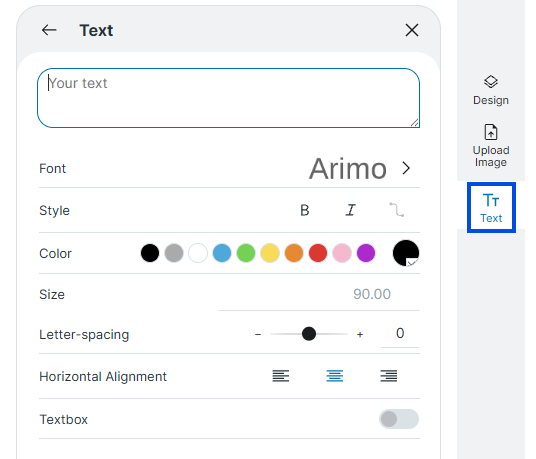
How to add text
Step 1: Open the Text panel
Click Text on the right. Type into the text box at the top. Your text will appear on the product.
Step 2: Choose your font and styling
Use these settings to adjust your text:
- Font: pick a font style
- Style: bold, italic, or arch the text
- Color: select a color swatch
- Size: increase or decrease the text size
- Letter spacing: spread the letters out or bring them closer together
- Horizontal alignment: left, center, or right
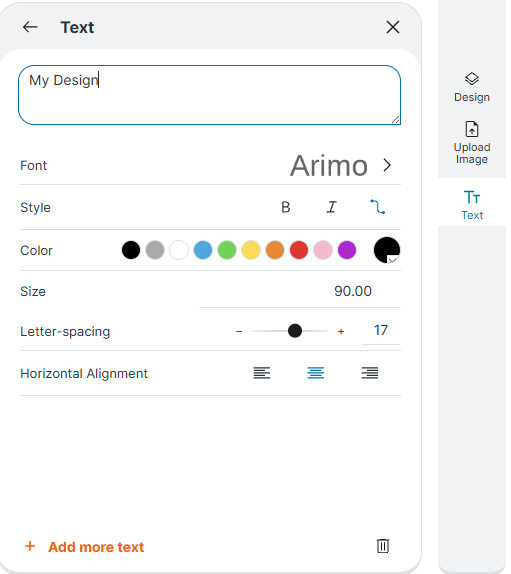
Step 3: Add another text area
Click Add more text at the bottom of the Text panel to add another text box.
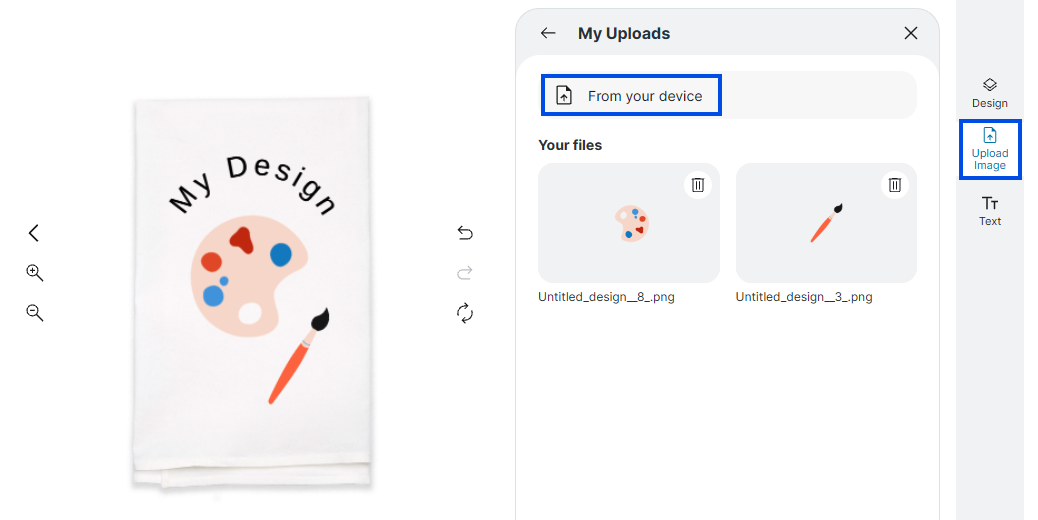
How to upload an image
Step 1: Open Upload Image
Click Upload Image on the right toolbar. Then click From your device to choose a file.
Step 2: Add your uploaded image to the product
Your uploaded files will appear as thumbnails in My Uploads. Click a thumbnail to place it on your product.
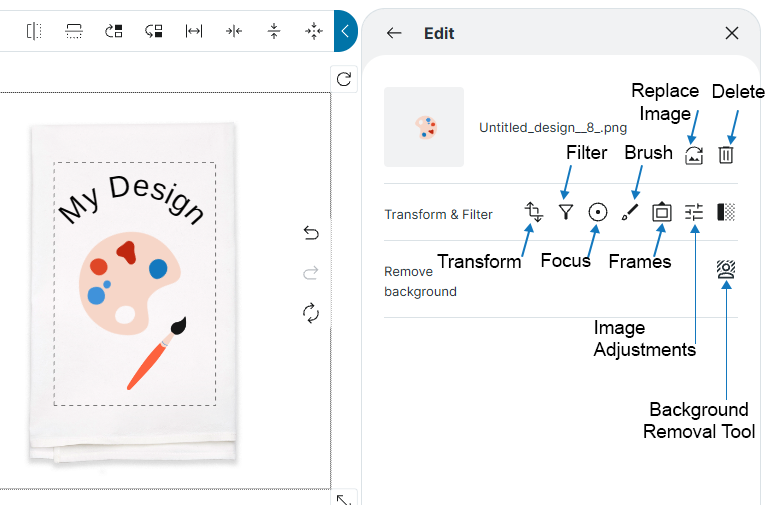
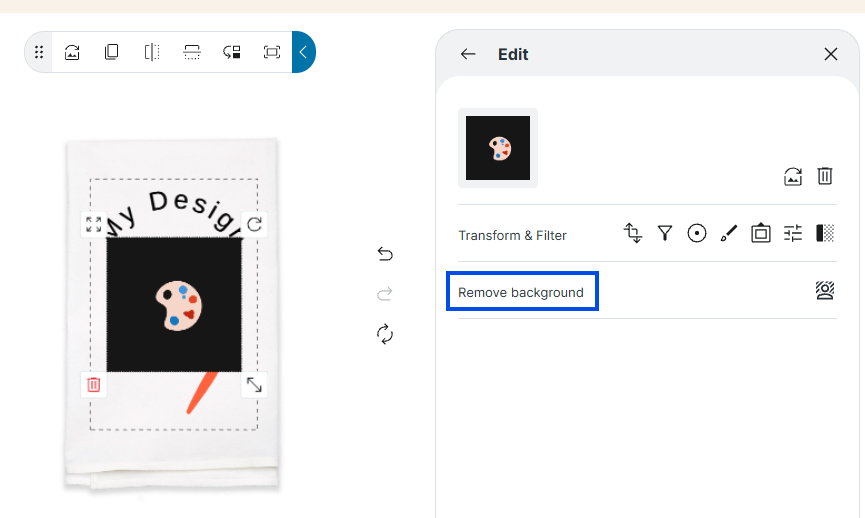
Step 3: Edit an uploaded image (Transform and Filter)
Click the image on the product, then use the Edit panel to adjust it. You may see options such as transform, filters, and background removal.
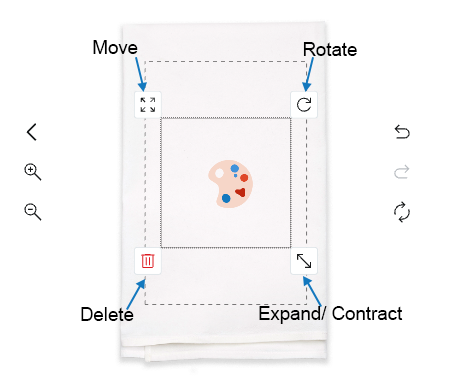
Move, resize, rotate, delete
Move
Click your text or image on the product, then click and drag it to a new spot.
Resize
Click your element, then drag the corner handle to make it bigger or smaller.
Rotate
Click your element, then use the rotate handle to rotate it.
Delete
Click the selected element, then use the delete icon to remove it.
Saved designs, Save, Preview, Download Mockup
My Saved Designs
Click My Saved Designs to view designs you saved earlier. You can search for a design and reopen it.
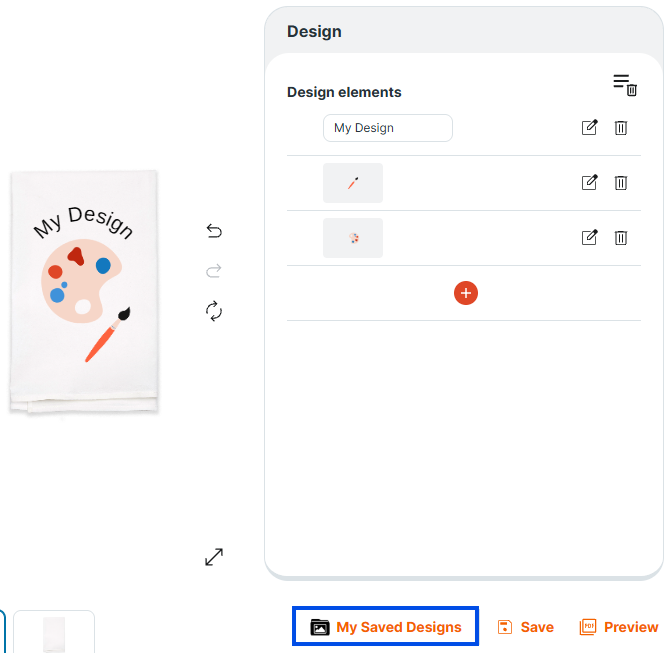
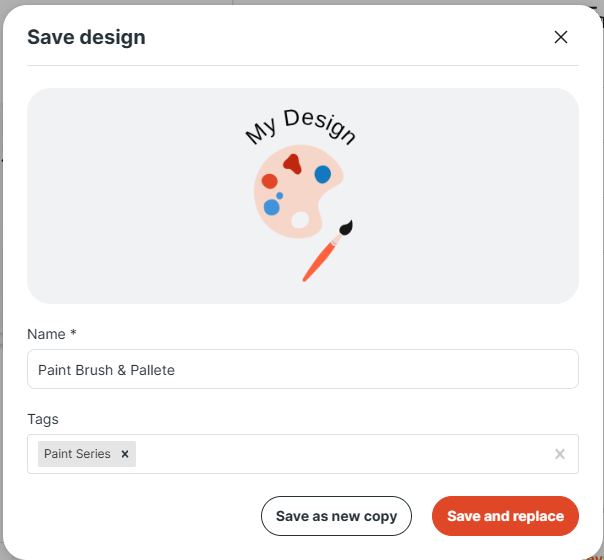
Save
Click Save to store your design so you can come back to it later. Give the design a name so it is easy to find, and add tags so you can search later.
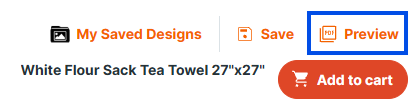
Preview
Click Preview to see a clean preview of your design on the product.
Download Mockup
Click Generate PDF to download a PDF mockup of your design.
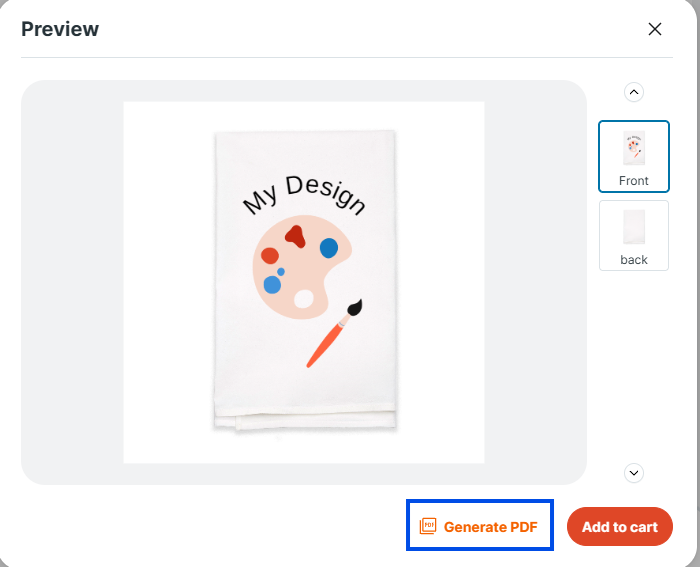
Front and back views
Switch between sides
If your item has multiple sides, use the Front and Back buttons near the bottom left of the customizer.
Helpful tip
Generate PDF Mockup and Add to cart
Generate PDF
In the preview window, click Generate PDF if you want a proof file for your design.
Add to cart
When your design looks right, click Add to cart. If you want to keep a copy for later, click Save first.
- Your design stays inside the printable area
- Text is spelled correctly
- You reviewed both front and back, if available
- You previewed one last time
Selecting the Product Quantity
How quantity works
After you add the product and confirm that your design has been saved, a quantity box will appear. Enter the number of items you want in each packaging option.
- Bulk Packaging = number of items packed together
- Individual Packaging = number of items packed separately

Important
If you need to make changes:
- Return to the product page
- Upload your saved design again
- Click Add to Cart
- Enter the correct quantities
- Remove the incorrect item from your cart
Troubleshooting / Warnings
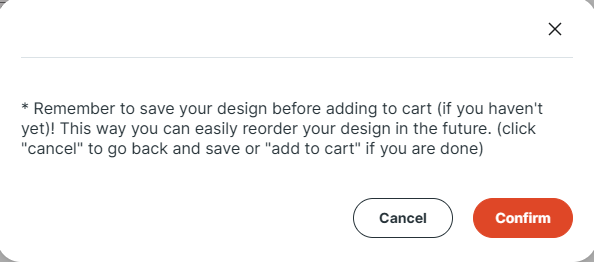
I received a warning to save my design
Every time you add a product to the cart, you may receive a message reminding you to save your design, even if it has already been saved. If your design is already saved, select Confirm.
I cannot see my uploaded image
- Click Upload Image again and look under Your files.
- Click the thumbnail to place it on the product.
- Zoom out to see if it is placed off to the side.
My text is too small or hard to read
- Increase Size in the Text panel.
- Adjust Letter spacing for better readability.
- Try a simpler font.
My design looks off center
- Zoom in and reposition slowly.
- Use the dashed print area as a guide.
- Use Preview to confirm placement.